 BLP Workbench
 Users
Admins manage who can sign in under Admin › Users. This page covers adding people, what admins can do that other users can't, resetting passwords, viewing the app as someone else, and the recovery admin account.
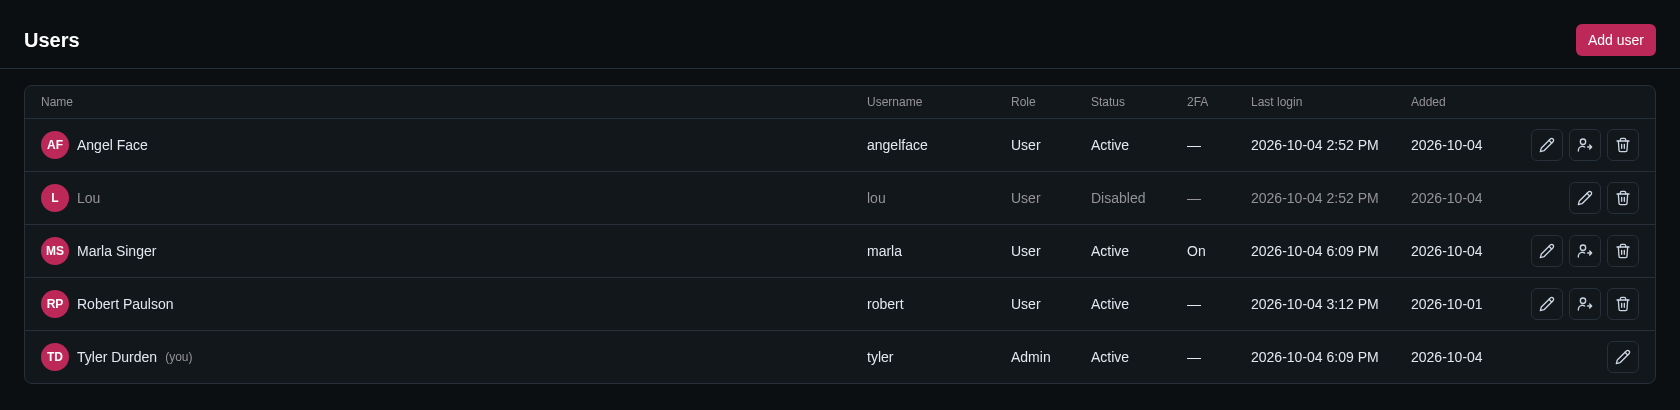
Admins and users
Every account has one of two roles, shown in the Role column:
- User: works with everything in the app — deals, quotes, projects, companies and contacts, products, inventory, suppliers and vendors — including removing notes, files, time entries, locations and quotes inside a record.
- Admin: everything a user can do, plus:
- the Admin menu in the sidebar: Settings, Modules, Users, Activity, Backup & Restore and Maintenance;
- deleting whole records (companies, contacts, deals, projects, products & services, suppliers, vendors and purchase orders);
- committing inventory counts, switching how stock is kept, and deleting stock locations;
- deleting company files whose kind is set to Admins delete (see Company files).
There are no other roles or per-page permissions.
Adding a user
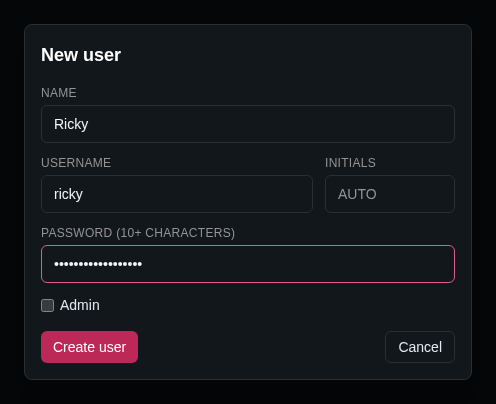
- Go to Admin › Users and click Add user.
- Fill in Name and Username (what they type to sign in). Initials are optional; left blank, they're made from the name. Initials show on avatars and board cards.
- Enter a Password (at least the length set in Settings › Security; not the username or a common password) and pass it on to the person. They can change it themselves under Profile.
- Tick Admin if they should be an admin.
- Click Create user.
Usernames must be unique. A deleted user keeps their username until they're purged in Maintenance.
Editing a user
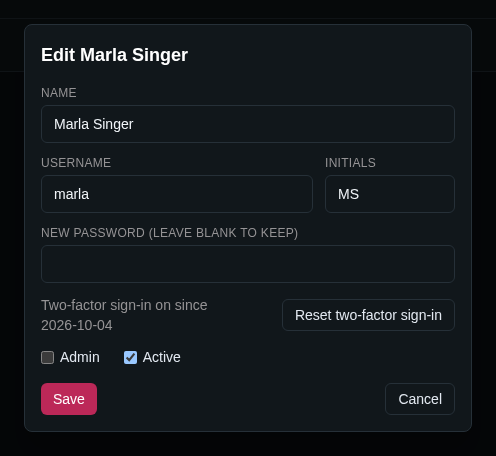
Click the pencil (Edit) on a user's row to change their name, username, initials or role. You can't remove the admin role from your own account or disable yourself, so there's always at least one admin.
The Last login column shows when each person last signed in; Never means they haven't yet.
Resetting a password
Admins don't need the old password to set a new one:
- Click Edit on the user's row.
- Type the new password in New password (leave blank to keep).
- Click Save, and give the person the new password.
Setting a new password signs the person out everywhere, in case the old one was lost or seen by someone else.
People change their own password under Profile (click your name at the bottom of the sidebar), which asks for the current one.
Two-factor sign-in
The 2FA column shows who has two-factor sign-in on. Each person turns it on in their own Profile; to require it, see Security.
Someone who lost their phone (and their recovery codes) can't sign in. Click the edit button on their row, then Reset two-factor sign-in and confirm: they sign in with their password only until they set it up again (straight away, if it's required). Their sessions and remembered devices end.
Disabling and deleting users
When someone leaves, you have two choices:
- Disable: click Edit, untick Active and click Save. Their Status becomes Disabled: they're signed out on every device right away and can't sign in, but they stay in the list and can be turned back on at any time.
- Delete: click the trash can (Delete) on their row. They can no longer sign in and leave the list. An admin can restore them from Maintenance, where they can also be purged for good.
Either way, their name stays on the records they created or changed and in Activity. Only purging removes it. You can't delete your own account.
Viewing the app as someone else
Admins can impersonate another user to see exactly what they see, for example to check a problem they report.
- On Admin › Users, click the Impersonate button (next to Edit) on an active user's row.
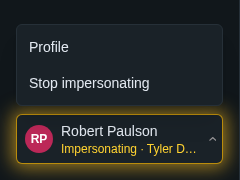
- The app reloads as that person. The user card at the bottom of the sidebar glows amber and reads Impersonating · your name.
- To go back, click the user card and choose Stop impersonating. You return to Admin › Users as yourself.
While impersonating, you have that person's role: if they aren't an admin, the Admin menu is hidden. Anything you change is saved under their name and marked in Activity as "their name (by your name)". Starting an impersonation is logged too. You can't impersonate yourself, a disabled user, or the recovery admin.
The recovery admin
Whoever runs the server can add a recovery admin account in the install's settings file (.env) with ADMIN_USER and ADMIN_PASS. It's meant for getting back in when nobody can sign in as an admin, for example when the only admin's password is forgotten.
- While both are set, that username and password can always sign in, and the account is always an admin.
- It isn't listed under Admin › Users and can't be edited, disabled or deleted there. Its password can't be changed in the app; it's whatever is in
.env. Its Profile says so. - ADMIN_USER must not be the username of an existing user.
- Changes made with it are recorded under its name (Administrator unless changed in its profile).
To use it: the person running the server sets both values, restarts the app, and you sign in with them. Fix the problem (for example, reset an admin's password under Admin › Users), then have both values removed and the app restarted again. Once they're removed, the account can't sign in, but its name stays on records and in the history. See The recovery admin for the server steps.